
 Question: Hi. I am just starting to teach my 5 year old QH mare about collection (I know, a little late). She is getting the idea of bending her neck, giving to the bit, softening, and her head carriage, but now I want to start getting her to round up her back and drive from behind….but I do not know how to teach that. Could you give me some training tips? Thanks so much. –Erin
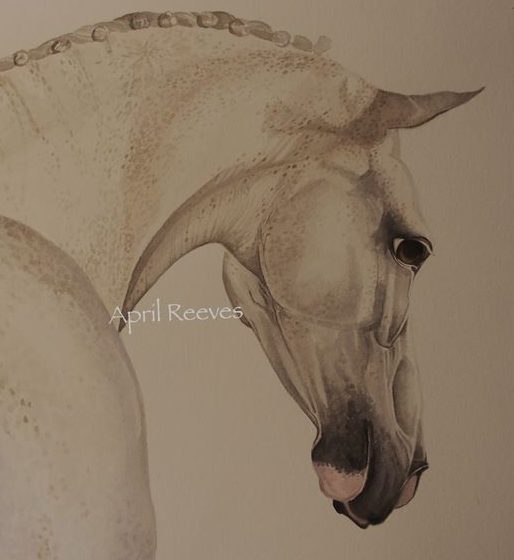
Answer from April Reeves: This is one of my longest and most comprehensive answers yet on the foundation and post foundation work and exercises to get a horse light, round and started in collection. This answer takes the mystery out of the difference between connection and collection. It is about one year’s worth of work and exercises anyone in any discipline can do. Enjoy!
 Hello Erin. Let’s start with connection. This is where you are with your horse at the moment. Connection is one of three important parts to foundation training. The first is rhythm and cadence, second is supple, and third is connection. I have a scale (or levels) I work with: a good whoa and go button, then rhythm and cadence, suppleness and connection. These are the basic foundations to any horse’s training, regardless of discipline (English or Western).
Connection is different from collection, as it is the exercises you do to get a horse on the bit. To get collection, the horse must first be good at moving on the bit. You must have connection to get collection.
I want to make sure you have all the foundation work on your horse first before you move ahead with the exercises I will give you (without it, I will be giving you work that you will have trouble performing). These are the exercises I do with all horses, regardless of their future discipline, and are the first things I put on a greenbroke horse.
These foundation exercises are good for you to try on your horse, because if your horse struggles with the freedom these exercises allow (and teach), you will need to complete each one separately in order to move into collection work.
(Excerpts from “Herd bound horse” on April’s Blog)
One-Rein Stop at the walk,trot and canter (for obedience, softness and lateral flexion)
You can do this exercise at the walk, trot and canter, as you progress. It’s valuable for teaching a horse to come off the bit and work in vertical flexion, as it supples the sides of the horse (lateral). A soft supple horse returns a soft mouth.
It also teaches the horse to shut down immediately, and it’s such a valuable exercise to teach if you have a horse that may be a bit volatile or explosive at odd moments. Once they learn to shut down easily, just the dropping of your hand to the rein will bring them back to thinking brain and stop them before they get dangerous. I realize your horse is not likely in this category, but this is good information for you to use in the future.
I always use the softest bit available, which is a French link snaffle. It has two breaks in the middle, and the middle looks like a dog bone. It does not have the ‘cracker jack’ effect that an ordinary snaffle has, and therefore does not create anxiety when first starting out.
Stop Button with Lateral Flexion and Obedience
When you start, make sure he has a really good stop button. When you first walk forward, ask your horse to halt by bringing his head gently to one side.

Run your hand down the rein
Reach down one rein and guide his head fairly close to your knee (you need to bring his head close enough to your knee, but far enough away to bring his head closer on his own without your help) until he gives.
The give will feel as if there is suddenly no weight on the rein. This often happens quickly so be watchful of it and ‘feel’ for it. When he gives, drop the rein immediately and let him bring his head back to center (it is important to drop the rein immediately as it is the release that teaches). If he walks off, bring his head around to the other side in the same fashion, and when he softens, let him go.
Make sure there is no pressure from the opposite rein. Only pressure from the one rein should be used. You may have to go back and forth, side to side for quite a few times at first. When he finally does get this, he will stand quietly while you fuss around up there, patting his hindquarters and gathering your reins.
If he ever walks off on his own, repeat until he stands, and until you use both legs to ask him to move. Horses need to stay exactly where you put them until asked to change. This is important as it means the rider must be consistent with the delivery of the aids and not be good one day and slack the other.
If your horse keeps moving in a small tight circle with you holding his head close to your knee, sit up straight and go for the ride until he stops. You can sit there longer than he can circle. Keep straight – don’t lean in. Continue the exercise no matter how long it takes. If he gets excited, just stay there with his head close to your knee and let him react. It will be very uncomfortable for him eventually and you will have made the right thing easy and the wrong thing difficult.
Another advantage of this exercise is that it takes away the power and drive from the hindquarters. We call this ‘disengaging the hindquarter’ (taking out the clutch). When a horse is straight, they can get into all kinds of trouble and become dangerous. Without the power, they lose that ability, and learn to shut down and focus. It moves a horse from instinct brain to thinking brain. Horses by nature will not use the thinking brain much; humans have to teach them to think first.

One rein stop and lateral flexion for softness and control
Once this lesson is working, begin to walk him around, keeping a fairly loose rein. Then do the same stop again at the walk. As you ask for the halt at the walk, draw your energy and weight down into your seat and stirrup. The horse will feel this and eventually pick up on it, but you need to incorporate that plus the one-rein stop at the same time, at the beginning.
Remember to always change sides so that the horse does not get sore on one side. This is a valuable exercise for lateral work and suppleness. I do this at a stand still with every horse, every time I get on. And you should do it every time you ride, regardless of how advanced you get with your horse. You can never overdo this exercise, as it gets the horse flexible and ready to work at the movements you are about to ask for.
Once you are comfortable with the one-rein stop at the walk, move your horse up into a trot and use the one-rein stop to stop him. When he stops, sit quietly for a moment and then move him up into a trot again and repeat. Always change sides. Continue to do this until he stops quietly. Remember to sit straight, no leaning, and bring your energy and weight down through the seat and stirrups. Work at the trot for some time, and gain a steady rhythm with the horse before you move into the canter. If the horse is still excitable during the trot, move back to the walk. Always go back a step or two – never move forward if the horse is not getting the lesson. When horses are not quick to learn a new exercise it’s because the past ones have not been done well enough and long enough.
You can never do too much of this exercise. When asking the horse to stop during the trot and canter, do not pull his face with force. Ask him to follow a feel and gently but with confidence turn him in to stop. If you pull too quickly you run the risk of him falling. Safety is always first.
What Your Body Should Be Doing
Keep yourself upright and squarely in your seat. Keep your legs off the horse for the stop or you will be sending conflicting messages. Your reins are always loose.
Exercise For Responsibility, Rhythm and Cadence
This next exercise will teach your horse to take responsibility for his gait. It’s a great way to see if your horse is ready for advanced work, especially collection work. To get collection well, a horse must be moving freely without the constant nagging of the rider’s legs. As the horse moves into highly advanced dressage moves, the riders leg must be moving more, as that leg is now telling the horse to change constantly. Before this though, a horse must learn to move out on his own.

Trotting exercise for rhythm and cadence
You should never have to constantly push a horse every few strides, nor should you have to try to correct a fast horse all the time. Horses should stay in the gait you ask until you ask otherwise, and this exercise will help. It’s also easy. You will do very little. There is no direct pulling on the face or aggressive motion on your part.
Let the horse trot at the speed he wants, and gently guide him to stay in the circle. Keep your reins loose and allow your horse to trot freely. Do not pull or try to change his trot speed. Just stay there and go for the ride, quietly, keeping your legs off the horse. Keep the circles fairly large, as you don’t want to put stress on the legs and muscles.
Your only job is to make sure he does not change his gait. If he slows down and almost breaks into a walk, bring him up again. Ask with your legs once, and if he does not move forward with speed, ask again using a crop and legs at the same time, and mean business. Let him jump forward, even canter for a few strides then bring him softly down into a trot again. Never pull a horse back once you have asked him aggressively to move forward. It is a conflicting message for him as you ask to go forward and then check him. This can make him very anxious and you can lose his trust. Always in training, remember what the single lesson is. In this case, it is simply to move forward. As time goes by and he gets better at this, then you can refine it, but for now it’s one lesson at a time only. This is basic introductory movements, not advanced work.
If your horse is more likely to speed up into a canter, each time he does you are to use the one-rein stop to bring him back to a trot. The instant he moves back into a trot, release him and allow him to move forward first, then gently guide him back to the circle. I don’t use two rein stops at this point, because I’m still teaching the horse to take responsibility for his own actions. I also don’t like two-rein direct pull stops because they build up resistance in horses who do not understand how to give at the poll and jaw.
It’s important to remember to bring the horse back to a trot from the canter, not a walk or stop. Remember what the lesson is: trot, rhythm, cadence and obedience. You must stay in the trot at all times. The only exception is above, when you are doing the exercise to move forward with obedience, but even with this exercise you will still bring the horse back to a trot should he move forward at the canter at the beginning.
When you have this working well, move him into the canter, and keep it, staying in the circle. If he breaks into a trot, do what it takes to keep him in the canter. If he begins to balk, do not stop and try again, as this only teaches him to shut down when HE wants to.
Your legs and hands
Also during this exercise, do not ‘nag’ with your legs at all. The point is to get the horse to continue it’s gait on it’s own without your help. This teaches the horse rhythm and responsibility.
Your hands remain quiet and still with the exception of guiding the horse, by picking up one rein or the other, never both reins at the same time. You should not have to force the horse into any circles. If this happens, go back to the one-rein stop at the walk. This exercise will teach you to stop the direct rein habit of pulling back with both reins as your first instinct to stop or change gaits. You should learn independence of hand first, and that includes stopping horses with one rein. It is more effective and produces results faster.
Try to change the circle direction often. You should never overdo this or wind the horse. If he gets hot or winded, stop him and let him catch his breath. Once he is recovered, you may resume the circle. I never wind a horse as it can damage them permanently and sour them.
Why does this work?
Horses seek comfort by nature. Since he does not know how long he will have to trot, eventually he will realize that it may be best to slow down and conserve his energy. This is where the lesson is: when he decides this on his own without any help from you.
With some horses, this lesson can take an hour a day for many days, depending how deep the problems run. It is important that you do not give up after a day or so. This does work on even the most stubborn horses. Eventually they all come around. Remember to let the horse catch his breath often.
What’s amazing is that you just sat there and did very little. There are many ways to create a great foundation without all the pulling, frustration, aggravation and expensive training. All my students learn this before anything else. You cannot do anything without cadence, rhythm and calm first. This is the foundation to begin all other training exercises.
After about 20 times, you will notice a rhythm and steady cadence to your horse’s gaits, from the walk to the trot and canter. Do this exercise at the canter also, as many people avoid too much canter work. I personally spend a great deal of time in the canter, as it is part of my interval training schedule (breathing and endurance) and obedience in speed gaits. Never be afraid of the canter – you can’t improve on something if you don’t do it. However, if you have trouble staying in the saddle during the canter, it is well advised that you take some training to improve your seat and balance, as often horses canter quickly to avoid the pain and discomfort of the rider coming down hard on their backs too often during the canter.
Lateral Flexion Exercises
This exercise is very similar to the one-rein stop, with a slight twist (no pun intended).
Begin at the walk, reach down one rein and guide the horses head fairly close to your knee (you need to bring her head close enough to your knee, but far enough away so that she can bring her head closer on her own without your help) until she gives. Keep your hand planted firmly against your knee or thigh. It’s important that the horse does not move your hand.
Keep your inside leg on the horse in a rhythmical bumping, to encourage the horse to keep moving. As in the one-rein stop, you are looking for a moment of release. When you get it, bring your hand down to your knee and plant it firmly there. Keep your horse moving the entire time.
Once you get a second release, let the horse move forward a few steps straight, and then pick the horse up on the other side and repeat the process.
Make sure there is no pressure from the opposite rein. Only pressure from the inside rein should be used. Go back and forth, side to side.
Leg Yield/Hindquarter Exercise for Lateral Flexion #2
This exercise develops the hindquarter reach under the horse’s bellybutton. In order for a horse to balance upright in the gaits, they must bring their back legs under and in the center of their footfall pathway. By nature, a horse leans the opposite way of going, and often uses the back legs in a box pattern for moving quickly and balance. Now we come along and ask that box to change into an upside down triangle. While this is not easy at first for the horse (as they can fall over if they do not balance properly), they will need to learn this in order to stay upright and perform the tasks and movements we ask. The horse needs the time and experience of this new way of moving in order to gain confidence. This exercise also serves as a leg yield to ask the hindquarters to move away from the pressure.
As you walk, bring one rein up behind the wither towards your opposite shoulder without crossing the withers. The horse’s head should be in about the same position as the one-rein stop. Use your inside leg to yield the hindquarter over and the back legs to cross over. Ask for only one cross over step at a time, and gradually build on that until the horse swings his hindquarters away with ease and a soft aid. Switch sides each time. Allow the horse to walk 2-3 straight strides before picking up the other side.
You can never do enough of these exercises. I use them before, in the middle and at the end of every ride. Just as a human runner would stretch before and after a run, so must your horse.
You will find that they help release the poll once your horse becomes supple and stretched. It’s in this poll softening that you will find vertical flexion – where the horse gives at the jaw and poll.
Vertical Flexion
I am not comfortable with teaching this exercise in an article, as it really is one that you need to see, but here goes.
This exercise I do on every horse I get on for the first time; it lets me know where the horse is at in their training. If that mouth is not soft and giving right away, I know the body of that horse is hard also.
I really like this exercise for dressage horses and horses that need to stay soft in vertical flexion. One thing to remember with this exercise, it is not collection. It is simply another exercise that teaches the horse to break at the poll and give in the jaw. It is an exercise to stretch muscles through the neckline and skull region. I see too many horses that need nosebands to keep their mouths closed. A horse that is truly soft in the poll and jaw will never need a noseband. It is easy and simple to teach this to a horse, and it does not make the horse ‘behind the bit’. Horses carry their heads where it is comfortable and works for their particular physical structure and anatomy. Done properly, it will not make a horse hard mouthed.

Drop the rein immediately as the horse softens and gives
In this exercise, you are going to take up both reins evenly, and pull back, holding both hands solidly against your thighs/hips. Do not let the horse move your hands what so ever (you are a brick wall). Do not put too much pressure on the reins; just enough to be uncomfortable for her. Hold them there until she drops her head and gives to the pressure (you must feel 0 weight in your hand, if only for a split second). When she does, drop both reins like they were really hot! Let her release, and think for a moment about what just happened; then take up the reins again. Some horses really fight this, even throw their heads backwards; take care not to overdo this. You don’t want to pull really hard or ask for the head in too close to the chest. You just want the horse to give to the downward pressure and release the pressure on your hand. Reward the slightest try.
It often takes them a while to figure this out, but after about the 5th time you will find that the horse begins to seek comfort ‘down’. This is the key to this exercise. The horse is thinking “wow, if I just drop my head low and keep my chin in, the rein pressure disappears. I have my rider fooled! I’m going to just keep my head low and in, and she can’t pressure me.”
Why does this work?
Horses seek comfort by nature. Eventually, she will drop and lower and bring her head in on her own the second she feels the pressure. Horses usually bring their head up to avoid the pressure, the same way they will lower their head to avoid it. Because the human wants the head low, the human must show the horse another way to avoid the pressure other than the head up. It’s simple really, except that the human considers the head up as bad, and the head down as good. The horse has no idea that one is bad and one is good. He’s just taking responsibility for his own comfort. The horse is learning this on his own, without any help from you (other than setting up the right environment to learn it).
Another reason why I like to put this technique on a horse fairly quickly is because it is safer than having a horse’s head up high. Do remember though that this is not collection – it is simply a vertical flexion exercise only. Real collection comes from behind, not from the front.
What is very important Erin is that you are able to feel the right time to release her. Always release when she shows the slightest try. Do not expect amazing results right away, as these exercises take time and consistency. Do not get angry or increase your rein pressure in any way. If she does not respond right away, stay in the same place with your hands, and wait it out until you get the smallest try. This is so important – I can’t stress this enough! You must stay consistent with this exercise in order to get the result you want. You must not let the horse move your hands one fraction of an inch.
Now What?
If your horse has gone through each of these exercises easily and properly, you are now ready for those exercises that will help her round up and collect. First, let’s start with connection.
Connection
To get a horse on the bit, move out at a decent walk, and in a three part movement, counting “one, two, three, soften”, increasingly add pressure with your legs and hands gradually. For count 1 gently offer a small increase of pressure to the horse. In count 2 increase the pressure with both aids, and in count 3, increased pressure again. Then soften and feel for the horse. I use one second for each count.
At first you may need to use a bit more pressure than you like, but exaggerate to teach and refine as the horse learns. Eventually, with lateral exercises and this one, your connection work should come along quickly.
Move into the trot and work on connection at this gait until you get it easily before moving into the canter.
Straightness
When the horse’s spine is following the axis of the circle you are performing, your horse is straight. All the body parts line up properly. The horse’s shoulders will line up with your hips, and your hips will line up with the horse’s hips.
If you find the shoulders or any other body part move in another direction, the horse is not straight.
To correct for straightness, you must remember to use your outside rein. If you overuse the inside rein, you only over bend the neck to the inside and throw the shoulders out of the circle. Bring your outside hand up to the middle of the neck in front of the withers in a slight counter bend.
Practice using the counter bend and slide your horse’s shoulder to the inside of the circle. Once the horse is supple, you will be able to position the horse straight with a slight bend to the inside.
Straightness also applies to the legs. You want the horse to track from behind in the pathway of the front legs. The hind legs are usually closer together than the front legs, so a horse will not be able to step in the same path with the back legs as the front legs.
Suppling exercises, and moving the horse straight in the walk and trot will teach the horse to stay straight. Having someone on the ground watching all 4 legs move forward will help you to assess and feel the problem. Always push the shoulders over to straighten a horse (not the hindquarters). Learn to ‘feel’ your horse moving straight. Walk and trot without using the rail; use the inside of the arena to work on this exercise. It takes patience and repetition to perform this properly.
Lack of leg straightness will come out in the canter more obviously. You will feel the hindquarters move on a different path than the front legs. If you still get a crooked canter, go back to walk and trot work.
Impulsion
Have you ever seen a train wreck? Picture 5 cars and one engine. Place the engine behind the cars. Now, ask that engine to push the cars forward. The engine is the hindquarters of your horse. The 5 cars are the horse’s: head, neck, shoulder, ribcage, hindquarters. If these ‘cars’ are not in a straight line, the engine will push the cars all over the place and off the track.
Impulsion is the addition of ‘more power’ from the hindquarters. It is added slowly over time, and requires the horse to be straight.
If you add impulsion to a train wreck you get ‘more’ crookedness, head up, hollowing and all the things you don’t want.
You need connection (horse on the bit) to ask for impulsion. Carefully add impulsion to your horse when she is on the bit. Add it in small increments. If the horse hollows or brings the head up, go back to a slower pace and ask slowly again. Ask for small increases down the straight line of the arena, or diagonally across.
Impulsion is different from being forward. Forward is a direction. The horse must think about moving forward. The horse must be looking ahead to be moving forward.
Collection
All the above exercises and movements lead to collection.
Collection lets the horse perform jobs with greater ease and beauty. It ‘packages’ the horse into a shorter frame, raising the back and ‘engaging’ the hocks. Collection ‘loads’ the hind legs, as if the horse was running uphill. The trick to collection is to get the horse to put the heaviest part of it’s body (head, neck, shoulder) onto the lightest part (hind legs), shifting the gravity from in front of the rider’s leg to behind the rider’s legs.
I’m assuming the collection you are interested in is a ‘softer’ form of collection, which is slightly easier than the style of collection on an advanced dressage horse.
Exercises to take a horse into advanced levels of collection are shoulders in and haunches in. I will give you some great exercises to help you achieve a quality of collection (assuming your mare is built to take collection).
Circle – Decrease and Increase
At the walk, trot and canter, begin in a large circle, and with each round, decrease the circle one foot until you are at a smaller circle. Then begin to expand the circle, adding one foot to each diameter you ride.
Up and Down Transitions
Move in and out of transitions both up and down. Get the transition obediently by being consistent with your aids.
Skip-A-Gait
Work on missing a gait in your up and down transitions, for example, the walk to the canter, the halt to the trot – canter to walk, trot to halt. When you do this, do NOT get any of the ‘missing’ gait such as little trot steps in the middle of the walk to canter to walk. All the gaits must be clean. Do this in circles and straight lines.
Start by traveling on the circle in one full diameter, then change into the next gait. As your horse gets better, skip your gaits in a shorter sequence until you can skip from 3 steps of each gait. If the horse begins to anticipate, change direction and ask for lateral flexion work.
Collecting Half Halts
Much like connection work, collection work consists of single leg/hand pressure to ask the horse to collect the frame and shorten it. As the horse shortens, the gait will slow down because the legs will not be traveling as long in the stride. Instead, they will lift, especially the back legs (engagement), which brings the hindquarters lower. You should not lose your rhythm in shortening or you are not collecting properly.
As you trot and canter, add rein and leg pressure (closure of seat, hand and leg) in one single, short flowing motion (not stiff and mechanical) to shorten the stride. At first the horse will not be really responsive, but in time as the horse develops strength they are more capable to sit back and raise the front. Apply the pressure at every 4-6 strides, and shorten to every third stride once the horse begins to gain muscle and memory for the exercise. Only use enough pressure to get a response. As the horse increases it’s ability, soften these aids.
Lengthening and Shortening the Stride
Come down the long side of the arena, or across the diagonal. Close both legs on the horse and ask for a lengthening of the legs (not a quicker stride), keeping rhythm and cadence. Do not give the horse’s face away. Keep your outside rein in good contact, with soft elastic elbows and a straight line from bit to elbow. Keep your hands upright, thumbs up. You can shorten the trot at the post and sitting.
When working in an arena, take your corners deep.
Circles
You won’t get good at circles if you don’t do them. To start learning the ‘feel’ of a good circle, take a long rope with a stick at both ends. Plant one end into the dirt, and take the other end and draw a perfect 10 and 20 meter circle in the ground. Ride it until you can repeat it in other areas of the ring.
Why ride circles?
A uniform bend allows the horse to gain lateral flexibility. This aids in straightness, adding gymnastic ability. You get this by doing perfect circles.
The bending of the hind legs by doing circles encourages engagement, which leads to collection.
In doing circles, your weight is on the inside seat bone, the inside leg is on the girth asking for the ribcage to move to the outside of the circle, and your outside leg is back behind the girth asking the hindquarters to bend on the axis of the circle. The degree of bend depends on the size of the circle. The smaller the circle, the more bend on the horse, and the farther back your outside leg is. Only ask the horse to bend enough to just see the inside eye.
As you perform large circles, add small circles to the inside of the large circles. Make sure the horse does not slow down in the smaller circles. Power the horse through them.
Counter bend circles
On the side that your horse bends best, ask the horse to counter bend to the outside of the circle with just a hint of his eye to the outside. Use your outside leg on the girth, outside rein is at the wither slightly against his neck, inside rein straight. Why do this? This side of the horse’s body is not the good side but the stiff side. If the horse travels and bends well to the left, and feels stiff moving to the right, it is the left side that is stiff. The reason is that stiff or sore muscles can contract but they have trouble extending. As you move to the left, those left side muscles are contracting, but when you switch to the right, those muscles on the left side are now asked to extend, and when they don’t or won’t the right side feels stiff. We ask the horse to counter bend to the good side to stretch those muscles.
To equal the sides of the horse, do not work one side more than the other. Work both sides equally. The muscles have 3 movements to them: extend, neutral, contract. If you work one side more, the stiff muscles do not have a chance to work the full range of motion: stretch, neutral, contract.
 Counter Canter
This exercise is one of the best to get a horse to use his back end and balance. Begin a large circle on the correct lead, and through a figure 8, change direction without changing leads. Keep the ‘wrong’ lead through the turn and up the long side of the arena. Then move back through the figure 8 and back to the correct lead direction. Repeat. Do this exercise every day and at 30 days your horse will show a dramatic improvement in balance. This is one of my favorites. It also teaches obedience. Do not let the horse break gait. At the beginning, start with only a few counter circles and add as the horse gains muscle.
Turn On The Forehand
Stand your horse still. Bring your left leg back, asking the hindquarter to move around the front legs. At the beginning, ask for one step over and as the horse gets better, ask for several steps. Always, at first, get quality before quantity of movement.
I don’t overdo this exercise because it does not have forward movement to it. Practice it a few times a week just to make sure your horse is obedient to the leg.
These exercises should take you a year to perfect and work on. Ask for quality before quantity. Perfect practice makes perfect. If you have problems, go back to the beginning and rebuild your foundation.
Make sure your horse can do the foundation work (rhythm, supple, connection) before asking for collection work.
That should keep you very busy for some time Erin. Good luck!


nice post
wow you and I are so on the same page with the technique on how to properly start a young horse.
Pingback: New horse owner wonders if she should sell the horse « aprilreeveshorsetraining
Awesome response. It has been extremely helpful.
Thank you for our shared knowledge.
ar
I ride a lot. I believe in all that you say about collection but a friend challenges mesaying that there is no scientific evidence that a “rounder” or more collected horse can carry you more easily or better. He says it just looks more esthetic to us and thus we assign it all these properties.
When doing some research to try to respond I find that he is right at least in one sense. Everybody says collection leads to a better way of carrying himself, but it is like a religious statement. Nobody has done a before and after collection study measuring, let’s imagine, the pressure on the joints or any other variable that presmably improves due to collection. No scientific evidence.
If you say that collection does not lead to “a better way of carrying himself” everyone will ay you are an idiot. But I can’t defend that there is a big difference betwen this and the people that called Galileo an idiot.
Can anybody help?
Javier, I think there are several ways to interpret the “collection = horse carries himself better” statement. It could mean that collection makes carrying a rider easier on the horse, and it could also mean that collection makes the horse move more beautifully, and it could also mean that collection makes the horse move more efficiently when it comes to competitive disciplines.
I believe the second and third interpretations are probably accurate ones. Obviously a collected horse is more beautiful to watch, but more importantly (to me) a horse who collects properly is more balanced underneath himself, which prepares him for jumps, turns, flying changes, and whatever other exercises I require of him. A horse that can come off a jump and collect back up onto the bit is a horse that can turn more quickly and easily than a horse that lands and continues in a flat, strung-out fashion.
I’m not sure collection makes carrying a rider easier–in a straight line. But collection allows the *rider* to also become more balanced (because the horse is reaching under himself and more centered), which probably makes it easier for the horse to carry the rider around curves and gymnastic exercises.
Does this help?
I love this article, but I am wondering if the collection you are talking about is the same collection used to slow a horse down to a western style lope (I ride western).
And how is the cue for extension different from the cue for collection? In your article, the only apparent difference is that you don’t use extra rein pressure for the extended position. Is this correct?
And you mentioned countercantering. Should a horse either automatically know his leads or have been taught to change leads before he can countercanter? If so, where in this lesson would teaching flying lead changes be appropriate?
Kayla, personally, I do not think there is any collection in the “peanut rolling” lope the western divisions have adopted, and I have refused to train and show a horse under those conditions until they change. There is a huge difference in a truly collected horse and a horse that has learned to go slow and low. I have trained for Prix in dressage and shown western pleasure, and there are no similarities. I find the classic pleasure lope to be more of a mechanical, methodical process as opposed to the “opening” of the horses’ natural way of moving. I do train and show for western pleasure in the Arabian divisions, as they still accept a horse that moves in balance to the frame they were born with. Plus, the foot fall patterns are different. I find there’s this acceptance of slowing a horse down that gets confused with “collection”: it’s not. There’s also a difference in “energy” that sets western pleasure and true collection apart: a truly collected horse appears to be “lifted” from above in their movements. They can also change those movements on a dime without force. I don’t know which breed you ride, so it makes a difference, and if you ride QH and truly do want to achieve collection, I applaud you!
The cue I use for extension is very subtle, and I teach this only when the horse is secure in foundation work. It begins with a subtle release of the reins (you won’t see it from the ground) and the same subtle leg pressure. There is one more “ingredient” that’s not subtle: I change my “energy pattern”. This is a concept I will be writing about extensively in the next while, as it’s the difference between a good rider and a great rider; a trained horse and an exceptional horse.
For any work that requires “getting somewhere ahead of you” at either a faster gait, an extended gait or jumping (classic example) you need to “throw” your energy out there ahead of you. Because energy is not visible to the eye, it is passed off as not important, but in my world it is everything, and when you break and train a horse using energy, you will see rapid advancements as you go. Horses just “tune into” it; they are built that way. But humans cannot “see” it so to many humans, if they cannot see it with their eyes, it must not exist. Energy is felt by the horse through your body; when you use it appropriately, YOUR entire physicality changes. Horses feel this: I have helped riders understand this principle by using a few YouTube video’s on riders experiencing some dramatic problems, like rearing and bolting, and you can see it start with the riders first. A horse’s front feet will come off the ground the moment a rider shifts their energy from forward to stationary. But that’s for another very long post. I think you will understand what I am saying; by the sound of your question, you are already advanced.
When it comes to extension, you will only achieve the maximum that your horse can do naturally (running, playing). Know your horse’s limits and accept them. I don’t start by getting a horse to move really fast and then try to slow them down. I start by building up: asking small amounts of extended leg, about 10 lengths, so to ensure your hindquarters are engaged (energy comes from behind you). I don’t do much: just small amounts, so that the horse does not get sore. When I begin to teach this, I only do 3 small “trials” per lesson: about 3/4 of the way up the long side or diagonally down a ring, or outdoors or a trail I know to have a flat comfortable stretch. It takes time to do it well; don’t rush this or it will take 4 times as long. As the horse begins to understand the cues for extension, and does NOT increase the speed of his footfall pattern (tempo) every time you ask for it, you can begin to ask for frame and connection and move to collection. Now your horse simply shifts into an extended tempo without any change in frame or tempo from the original gait you were in. All this sets into place because you will have done the foundation work well and the horse is soft, not behind the bit, engaged, willing and sound. It will look invisible to anyone on the ground, but this is the end result you need to work towards. This method is for western horses only: not to be confused with dressage movements.
Counter-canter: one of my favorite things! One thing I am an absolute stickler about: horses cannot voluntarily change their leads without permission! Only event horses are allowed to do this. Otherwise, all other disciplines must stay in obedience to the rider’s request. I teach counter-canter on the babies early on. It helps them with balance and obedience quickly. I find it also helps them learn leads. If you have a horse that has training on it, that horse must be compliant in cues for leads and do them well first, before counter-canter work. Once they start changing on their own, it’s difficult to get them out of it. Also, where you ride plays a big part in the horses learning. I now have a 300 by 400 field for this work. I can start a very tough horse that wants to change all the time, and slowly begin to change the circle so gradually that the horse is unaware he’s moving in another direction. Eventually, they just learn the new balance, and you can ask for direction changes in smaller circles, until you work into asking for them by cue.
Teaching flying changes: for the babies, I teach this early on as well, but I also buy babies that change easily, naturally. No sense buying horses you have to work 10 times as hard on! If you’re working with an intermediate horse, again, have the leads and cues secure first. Don’t rush this work. If you can’t get flying changes easily, you are either asking too soon, the horse is sour or sore, or the horse’s natural abilities are not comfortable with them. There are horses out there whose physical makeup is not conducive to easy changes. I won’t go into “how” to get flying changes right now, because that’s one very big post, but get the lead cues obedient, get impulsion from behind, make sure he’s willing and go for it. All horses are different, and when it comes to training, there are no set patterns to it once the horse is out of “foundation school”. Each horse must be handled accordingly to their abilities, mentality, age, history and your expertise.
Thanks for this very educated question Kayla! Love it when someone actually asks for definition and depth! Let me know how it goes.
Thanks for the quick and helpful reply!
I didn’t mean a peanut rolling lope, just a slow canter while the horse is quiet and calm, with a low head that is soft and responsive to any pressure from the bit. But your answer was still helpful!
And the horse I ride, believe it or not, is a draft X walker mix that I aspire to teach suppleness and connection to. He is really smart and already has the one rein stop pretty good at a walk, and also has aquired a natural, slow cadence at the trot thanks to this article. He does have some trouble turning due to his large, gangly stride, but he is improving as I have him trot more circles.
Thanks for sharing your knowledge with me!
Ohmagawd. So much information. O.O ….Thankyou! This is gonna keep me busy. I needed some tips. It’s sooo descriptive! I wish I knew that much.
I hope you find this site useful Amalee!
Thank you so much for taking your time and posting this. I have been searching for the proper way to start out my colt and this is just what I was looking for! Thank you so much :) I have known what he needs to learn but not how to teach it so thank you so much :)
ONE SIDDED HORSE / HELP:
I have a PRE very one sidded , avoids working to the right, specially when session of work develops.
I would check for back issues and other physical problems that may be restricting movement. From there, if all is fine, it’s always a training issue. To get a horse equally balanced you must work both sides equally. For some reason your horse won’t stretch on his left side. I would need more information to asses this horse without seeing him.
I never imagined riding a horse could be so complicated. I struggle to understand the jargon. Is there a lot of hype involved in the various theories about training horses. I just hop on my horse and go for a ride and he does whats needed, but all this esoteric stuff makes me think I must be doing it all wrong. Did the native American Indians know all this stuff to be able to ride a horse well? I think not.
Native Americans did know a great deal of this work. It may have appeared “simpler” in the sense that it was less elaborate (as we humans always tend to create, sometimes with no valid reason), but their horses did canter smoothly and were obedient to legs and voice. As time goes by, we learn more and more about riding, and many new and improved methods have surfaced in the last 15 – 25 years, plus a great deal of older material that makes for some of the best foundation work still today. Sadly, some of the riding styles really need to leave the planet, but I’m betting I’ll be long gone before that happens! I’ve always believed that if your horse and you have a way of working together that makes both of you happy, why change it? Some people are just more tuned in to what their horse needs and likes. My favorite rides are bareback, rope around the neck, riding the multiple trails on my own property, for hours.
Great detail and wording for beginners and refreshers for an older person(me) !
Thank you this will help a Friend of mine – who doesn’t want to take this same (but better worded) techniques and put them to use ! on her Paint !
and a great refresher for me and my 15yr qrt ex reiner turned barrel racer !
haven’t thought of using counter canter in long time will be good to throw that at my boy ! We did in training and still do most of these exercises and have a great connection physically , mentally and emotional! My best horse ever !
I have an appendix who I have been slowly working with but we’ve had a few problems. He will not engage his hind end. I’m new to this and all the horses prior to him had come “pre-done” per say. I tried lowering the head, and this works until we move to a trot and then he puts his head back up and looses contact. And that takes me to another issue we face…he will not make contact with the bit. The closest I can get to him even beginning to listen in keeping my reins tighter than I’d like, wich of corse discourages him putting his head down even further. The lady I got him from said he was a great horse but had been sitting for quite a while. There’s a picture from a year ago of this horse with a nice topline, great muscles, and a relaxed yet attentive body…but he is not a very hollow looking thing with little muscle.
Any help would be great! I’m struggling to understand my boy.
I have found this article to answer so many questions that I had and has fulfilled a lot of gaps that I felt were missing in my horses training program and I also found it easy to understand and follow. Thank you for this article I can now print it and make cards and work on exercises as I go and hopefully reach my goals this year.
Pingback: How To Teach A Miniature Horse To Drive | Horse Training Course & Buying Guide
This is seriously one of the best posts I’ve ever read. I’m so glad I found it. The instructions are so clear, simple and to the point. Thank you for taking the time to share some excellent advice and laying it out very very well in excellent writing!!!
Great article!
I have a question about this exercise: Exercise For Responsibility, Rhythm and Cadence – my horse keeps trot during riding a circle but it is very very very slow trot, like in western pleasure (don’t engaged hindquarters, all the weight is on front), should I make him to go faster? When I want to make faster trot I don’t have any rythm at all…. I need to work all the time to keep speed. In canter she keeps very nice speed and rythm without my help.
Yes, she needs to move out. Carry a crop and use it once, with impact: don’t nag her. You may have to do it one more time. If it doesn’t work, you’re too soft. This is one time you have to make the request very black and white. If you do it well, once is enough. Horses will respond sometimes with a buck or jolt forward. Be prepared. Retraining ex-western pleasure horses is extremely hard, but it’s necessary.
Great read. Thank you. I will start that tomorrow.